Saturday, 3 March 2018

Powertex Design Team

I have had the honour of being asked to join the POWERTEX UK Design Team.
So here is my second blog I did for them.
I hope you enjoy it. 


First I set about placing, so I had an idea of what I was going to achieve.
I painted the fairy house in black Powertex. 
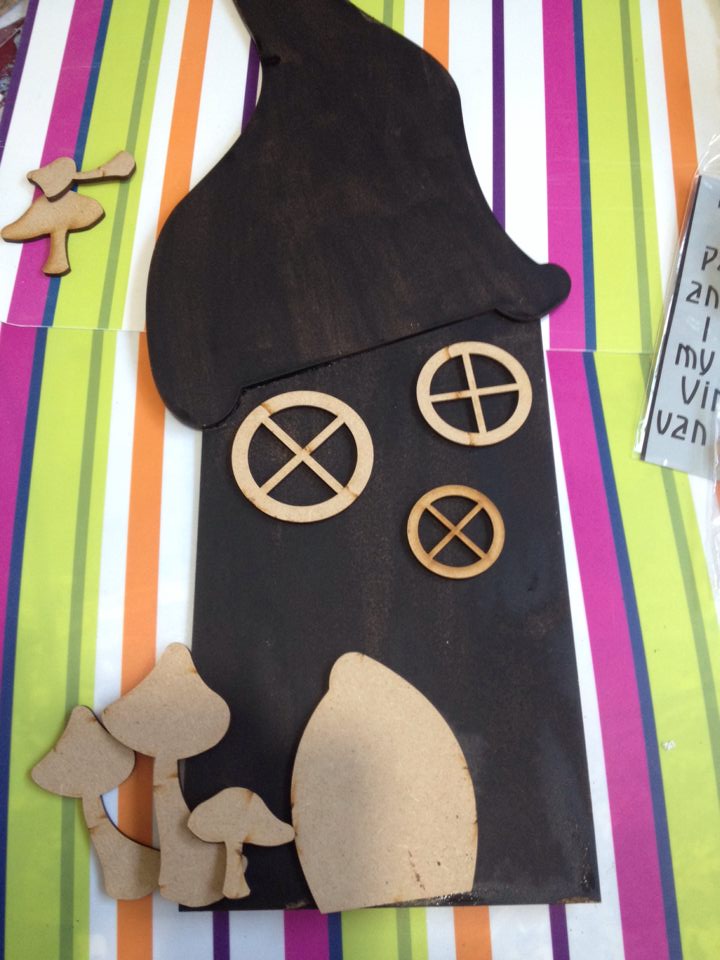
I then chose some material from my stash and dipped in the BlackPowertex and laid over my roof and then dried it.


I then decided to add some texture to the base of the Fairy house,
using the 3D Sand balls.

I then decided to use the Powertex ,Paperdecoration for my main texture. This is a really lovely texture as once saturated with the Powertex it stretches and makes a really nice texture. 


I next set about making some texture for my Fairy door and I used the same method as above with the 3D sand and Black Powertex, only I added more to make a kind of paste. I then used a palette knife to smooth it on the door and ran a crochet hook in lines to give it a wood effect, let it dry.
I also added some of the lace from the kit, to under the roof, to add extra texture.


In the next three photos, whilst the door was drying I started to decorate three of the toadstools from the kit. Again I used  3D Sand for the texture and this time, some red Powertex.

I did two layers with the red Powertex and 3D sand to add some depth and I painted the stalks with Ivory Powertex.

I then used some Mocha pigment and dragged it through the wet Ivory Powertex, to create lines, making my Toadstools look more lifelike.
I then wanted to incorporate the stencil onto my Fairy house but the Paperdecoration was too textured if you like, so I had to find a way to get the stencil to work. I came up with the idea of laying down some masking tape, to make a smoother surface, to add the stencil. To create the texture to add to the stencil, yep, you guessed it I used the 3D Sand and Black Powertex to form a paste and palette over the stencil. I then dried it with my trusty hairdryer, as I did not want to smudge the text.

I then added my windows and chosen embellishments and painted with black Powertex and dried.
I already had a colour theme and chose these Pigment colours and began to dry brush onto my fairy house. The beauty of this technique is if you don't like it, you can change your mind and re-do it!


And here is the end result.


These are the bits I had left, along with some lace, which I know I will definitely use in another Powertex project.

I really enjoyed making this kit and I hope to see all the Fairy houses you create.
Feel free to share them on the Powertex Addicts page on Facebook.
Laters Powertexers
Jinny

Monday, 22 January 2018

Learning new tricks

Well, it is looking like 2018 is a year for learning new things.
I have signed up for Instagram https://www.instagram.com/jinnyholt/
And I am teaching myself to display photos of my artwork, in a more flattering way with the help of an app on my laptop. Funny as I have had this laptop a couple of years and this year, have only just discovered I can do so much more with it, who knew? But have to say, all this techie learning is very time-consuming!!

Here are a few collage pics I have done so far.


Well, I must get to bed now as it is very late and one needs her beauty sleep!! 
Night all :) xx

Sunday, 14 January 2018

Some time away

Well, it has been a while since I have seen my eldest and my two Grandsons but this week, we are visiting them.
My oldest Grandson, normally always asks me if I can bring some stuff from "Nanny's shed" so not wanting to disappoint him, I packed some stuff for us to play with. 
I packed a couple of birdhouses and some photo frames, paint and some #Powertex. Up to now, we have decorated the birdhouses and tomorrow, we shall set about decorating the photo frames.
 This is my youngest Grandson 

 Here is the birdhouse, that Joe decorated


And this is the one Nanny did.

Thursday, 4 January 2018

Happy new year everyone.
Well, Christmas came and went, way too fast and now we are into a new year.
I got to make lot's of things for Christmas in my day job and at home.
Here are some of the things made over the Christmas period.
Enjoy.
 Made this one at home.


 Made these #Powertex baubles at work.


 I also had a go at making some wreaths, here are two of them.


Friday, 8 December 2017

Official exciting news

I am super excited about this honour of being asked to be on the Powertex Design Team for next year.
I have some big shoes to fill as the 2017 Design Team have done an awesome job.
I would like to thank Tracey, Anna and all the team at Tex towers.
So bloggers, watch this space for new Powertex products, tips and ideas and tutorials from the Design team.
Did I mention that I was super excited?


Thursday, 30 November 2017

Christmas and Powertex


I have been recently making Christmas wreaths to keep my creativeness flowing and had been racking my brains how to incorporate Powertex into the mix. Then it hit me that I could.

The frame for the Christmas trees are plastic cheap tinsel trees and I pulled off the tinsel and used the frame, then  I added red Powertex burlap squares to a plastic frame, added some mini baubles and Christmas embellishments. I have added some battery LED lights to under the frame and it really does look lovely. 

My Daughter did the brown Christmas tree and thoroughly enjoyed making it.

Sometimes if you just think outside the box, it comes to you.  


Christmas is nearly upon us

I have been trying my hand at some handmade Baubles
I have been trying different techniques with different materials.

Dragon Time

Good morning one and all. Having all this time to create is brilliant and even better I am remembering to blog about my antics as well. ...